Showing posts with label shading. Show all posts

Tuesday, June 23

A squirrely update


No, my Blue Squirrel isn't on fire or victim of a vicious attack. The orange thing underneath him, is supposed to be some sort of toadstool, something similar to this.  The colours are fairly bright and a little out of my comfort zone, but it's good to challenge yourself sometimes. The only regret I have, is that I used just a scrap of fabric to stitch on. It's a bit of a hassle with that tiny hoop... The squirrel is from this retired pattern. Looks very different in blue doesn't it?

In other news: my Shading Workshop started last week and the good news is that I'm running it again this Fall! Sign up will be open early August. :)

Tuesday, February 10

Shading Extravaganza


I'm trying my best to put a super fabulous online class together, as well as kits to go with it (and feed the family from time to time and conquer mountains of washing) so posting on this blog might be a little less frequent the coming months. I hope this Shading Extravaganza makes up for it....You guessed it, my online workshop will involve a good portion of shading but I'm putting my own spin on it. It's 'shading for the uninitiated', so if you have some basic embroidery skills and want to really learn something (instead of copying an example to the exact stitch) this might be a good one for you. :)

Tuesday, December 23

Flower Bear Finished & new project started


Finished my Flower Bear a week ago or so but the lack of daylight really made it impossible to make a half decent photo. So when the sun came out this morning I grabbed my camera and made a few photos.


Here he is a bit closer. I really enjoyed making this piece and it has inspired me to start another embroidery, similar to the Flower Bear.


I received a Frixion pen from Rebecca in an &Stitches Secret Santa swap (alongside other fabulous goodies like different M & M flavours we don't have over here...) and used it to draw directly on the fabric. So the lines are a bit wobbly but I really like the freedom of drawing up a design like that, even though it's not my usual method of getting a design on fabric. The roses are based on an old embroidery I saw on the cover of a book but I didn't follow the example too closely.


I also got out my Anchor Embroidery Threads (bought a big lot second hand on Ebay years ago) and found some interesting colours like a really bright red, a shade I haven't seen among my DMC threads yet. My experience from stitching a pixelated rose in French Knots earlier this year, made choosing colours for this project easier and helped in my understanding of shading. So I'm happily adding orange and pink and really dark red shades to stitch these roses. :)

I probably won't have much time to work on this over Christmas but hopefully I can bring you an update on this project in the new year. Hope you all have a wonderful Christmas!

Saturday, September 7

Bear & FIsh update

update bear and fish

I really missed working on my big Bear & Fish project. Yesterday I added some tiny berries and coloured in some more of the rose. I also started filling in some empty spaces in the background with 'moss' which actually consists of tiny French Knots in every colour green I could find in my teacup filled with floss leftovers!

update bear and fish detail

I'm really happy with how it looks so far even though it is for from perfect 'technically', especially if you look closely. I'm now looking to pictures of waves and clouds on Pinterest for inspiration for the background.

Monday, February 11

No need for speed: Slow Craft


For some time I had a rather large embroidery (it's a secret project, more about that later this year) in my large Qsnap frame. Well I call it my large frame (it's 11" square I think) but they make them much, much bigger than that! But now that project is finished (well the embroidery bit anyway) I have put my beloved Bear & Fish project in the Qsnap again. Yesterday I added the green leaves. Not really my finest shading work, but it looks ok from a distance. :) I really enjoy doing working on this piece. It's not for a pattern, not for a book and there is no deadline, it's just for me! Which brings me to this blog post by Lisa. She did a fabulous job stitching this organic fruit & veg themed piece, and, just like me, she stitched it for fun.

To me it seems that crafters often feel the need to hurry or produce lots of things (for whatever reason: deadlines, new projects on the horizon, demand etc) and many (myself included) have several projects in progress at the same time. It's a paradox really: making things by hand (which is a relatively slow process) but it better not take too much time! Why not make at least one of your projects a 'slow craft' project*. Something you make just for fun or which will help you develop and practice new skills. Are you ready to be a 'slow crafter'? Or maybe you already are? Let me know!

*after I had written most of this post I found out that there is actually such a thing called the 'slow revolution' and 'slow crafts'!

Saturday, January 5

Foxglove in stitches and an embroidery workshop


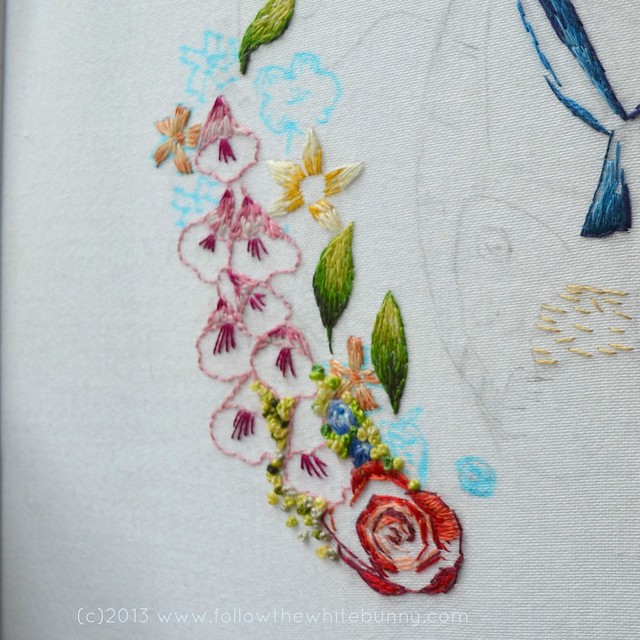
I managed to get a little bit of stitching done on my big Bear and Fish project around Christmas time. Deciding on what the best way was to embroider the Foxglove was hard. I tried different things, un-picked a lot of stitching but now I'm quite happy with how the Foxglove turned out.


While the stitching might look a bit frumpy and not-so-subtle up close, the over all photo gives a better idea how it looks in relation to the whole image.

Photo and Embroidery by Georgia Mc Donald
In other news: Claire over at Patch Fabric and Haberdashery in Lowestoft, Suffolk (UK) has an Embroidery Sampler workshop planned on February 23rd using my Princess and Abel patterns. Go check the details here. Unfortunately I can't be there myself but I have met Claire at the Fat Quarterly Retreat in London last year, she is a lovely person and I just know the workshop is going to be wonderful!

Within the next week or two I'm hoping to release a new pattern, I'm not going to reveal exactly what it is except that it is not too large and comes in three different varieties (all included in the one pattern). :)

Friday, December 21

A Bear & Fish update


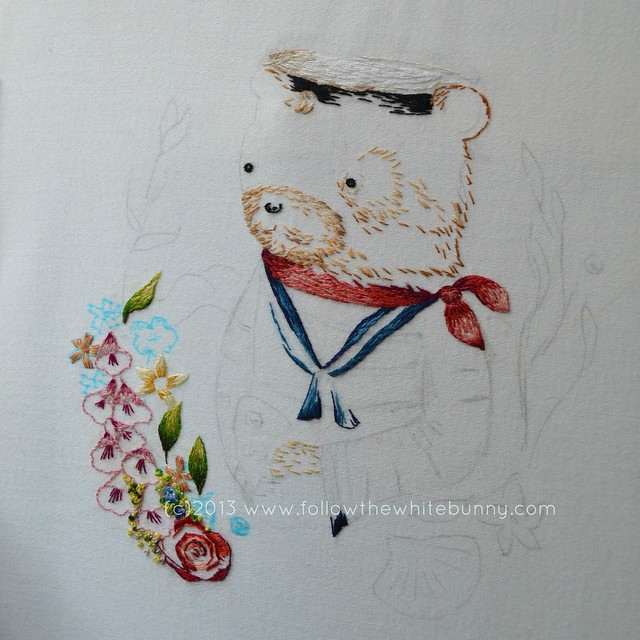
I couldn't wait to start stitching the bear's kerchief! I think it came out pretty good, maybe a little too smooth? But I kind of like that too. A little while ago, and I'm not sure if I mentioned his name here before, I stumbled upon the work of Stephen Mackey. He makes dreamy, slightly odd paintings and drawings. Somehow I'd like to bring some of that dark, slightly threatening feeling his work has into this embroidery piece. I'm not sure if I'm brave enough to go all murky on the background though. I have also started to stitch  some Foxglove on the left. Beautiful plant but quite poisonous too...

So far I'm very happy with the cotton satin fabric I'm stitching on. I'm pretty sure it's all I will use from now on for these really time-consuming, detailed pieces.


This was (is) my original Bear & Fish pattern my piece is based on by the way. Still available in the original, simpler, version. :)

So unless something really exciting comes up, I think I will be back her on the blog after Christmas. I always like to do a small(ish) project over the Christmas period. Last year I made this and for this year I was contemplating stitching the cute polar bear that's on the current issue of our zine except that I forgot to buy the beads. Any suggestions for nice, easy cross stitch patterns are welcome! Which reminds me that you all should check out this special Wee Little Stitches pattern to help raise money for the Sandy Hook School Fund and NAMI (National Alliance on Mental Illness).


Hope you will all spend this Christmas the way you like best!

P.S. Don't forget to enter my 'Inspirations' magazine giveaway

Thursday, December 13

Quick peek at new project


Here's a quick peek at a new shading project I'm about to start! Some will recognize the image as I have a similar pattern in my shop called 'Bear and Fish'. Not so much a favourite with the pattern buying public (although I always think extra fondly of the people who do purchase it) but I have a soft spot for this Bear. Story goes he's a lighthouse keeper on a tiny island off the coast of France...

Compared to the shading projects I did earlier this year (a Rabbit called Lucky and Boris E. Morley)  this one is rather big so that makes it a whole different kind of challenge to me. By sizing up I hope to get even more detail into the piece. I'm also using a different type of fabric now. Usually I embroider on quilter's cottons but I figured if I'm going to spend many hours on making something I'd better choose a slightly fancier type of fabric. It's called cotton satin fabric (medium) and I bought it online in a store called Mace & Nairn, a UK based Hand Embroidery Supply shop. The cotton satin fabric looks and feels really nice and it's definitely sturdier than quilter's cotton. Will keep you all up to date with the progress of this new project!

Saturday, October 27

Traveling Threads


Totally ready to move on from this shading experiment to another crazy one thread only project! I think I need one or two more sessions to put some final touches to this piece and than it should be done. Today I filled in some more of the clouds in the background and added two light pink flowery things in the foreground and a pink flower too.

The back of this piece is a bit uhm..chaotic.. I'm sure some people get shivers when they see this:


But then I'd rather pay more attention to the front of the embroidery and less to the back of it. As most of this embroidery is covered with fill stitches you can't see the 'traveling' threads going from one place to another. Obviously you need to be more careful when you do an outline only embroidery. :)

Saturday, September 29

Rabbit: progress in pictures from start till now


So...it started with a few simple stitches and then evolved over the months into something that is already quite special to me.  Even though progress is slow and I'm not quite finished yet, I think this is my favourite piece so far! (click on the photo to enlarge if you want to study some cat hairs  the details)

Sunday, September 16

Cloud


Here's my Happy When It Rains Cloud all finished. You can download the free pattern here. And read the shading tutorial here. I put him in a 3" hoop and added  a ribbon so I can hang my little cloud on the wall. Perfect for Fall, right?


Monday, August 27

Simple shading in embroidery tutorial


If you haven't tried shading in embroidery yet hopefully this tutorial will inspire you to take the first steps. Note that this tutorial shows how to simply use shading in a cloud (with round shapes). For other shapes and things (like animal furs or flower petals for example) other shading techniques are probably more appropriate, but that's for another time! :) With this tutorial I provide a simple pattern of a cloud. You can download the free pattern here.


The pattern is called Happy when it rains partly a reference to this song and partly because I plan to stitch the drops in happy colours (see photo above). If you decide to link to this tutorial or the pattern please refer to this blog post. Thank you!


This piece I'm working on, and especially the clouds behind the rabbit, was what inspired me to do this tutorial. I have tried to keep the tutorial short, if you have a question please let me know in the comments and I will answer it (for the benefit of all) in the comments as well.

So last week I did a call out if anyone was interested in stitching along with me (my cloud isn't finished yet either!) and a lovely bunch of blog readers have said they would try their hand at stitching a shaded cloud too. For them and for everyone else who decides to play along: please post your WIP's, finished clouds, experiments with shading in my Flickr group here. There are no deadlines but I'm thinking of awarding one voucher for my shop if really nice clouds are posted. :)


Things you need to stitch this cloud...


This is the stuff you need to start with your cloud embroidery (besides the printed pattern): A hoop, fabric, a water disappearing pen, an embroidery needle (size depends on how many strands you plan to use) and four shades of floss. You will also need some 'happy' floss for the drops (example pictured in the top photo) Obviously you will also need embroidery scissors :)

I transferred the pattern to the fabric by sticking the print to a window, put my fabric on top and traced the design with a water soluble pen. The Prym Aqua Trickmarker (fine line) is one of my favourite pens to use.


I wrote a bit about how to select your shades here but basically you take a dark, medium and light shade of one 'colour family'. These three shades should be enough to get a nice effect in your shading. Add white floss as well. I used DMC Mouline (six stranded) floss: Blanc, 169, 762 and 3799.

Starting your embroidery


You start by stitching the outline of the cloud with a back stitch. I used two strands of (six stranded) floss. You could use any number of strands but I'd recommend no more than three strands for this small project. Only one strand would be awesome too (which is what I'm doing in the Rabbit embroidery).  Less strands means a more subtle shading effect. I stitched the outline with all three shades of grey: a chunk of the dark grey here some of the medium grey there etc.

Simple shading example 


To show more clearly how shading works I stitched an example with six strands of floss. Again I wouldn't normally advise to use that many strands, unless you are making a HUGE embroidery that is. ;)


Along the curve of one of the parts of the outline I added a line of back stitches in dark grey. I think it is essential for effective shading to follow the shape of whatever your stitching. I started this top line of stitches a bit further from where the outline started and with the next line a bit further still. Also note that as I go along I'm not even 'connecting' the back stitches anymore. This is because I plan to add medium grey colored stitches in the gaps I leave. I'm gradually phasing out the dark grey and introducing the medium grey.


So basically as the number of darker stitches decreases, the number of medium coloured stitches increases. The same goes for your shading from the medium colour to the lightest shade of grey and for the lightest shade to white.

You don't need to pay much attention to where you place your stitches as long as they are following the shape. They don't have to be stitched along an exact (curved) line. As to the length of the stitches: don't make them too small and not too long either, but you really don't have to worry about a little variation in the length of your stitches.

shading with 2 strands and 4 shades

Movement and subtle colour additions

It's an option to stitch this cloud by shading near the outline and simply filling in most of the middle bit with white floss. If you want to add a little bit more 'lively-ness' and texture to your cloud however try adding the following two things to your piece: movement and subtle colour variation.

Add swirly stitching to your piece!

To add movement let your stitches make a flowing shape. Think a swirly long shape for example (see picture above). Even with using only one colour (white for example) this will add movement to your piece.


Blending in a subtle colour addition will make your embroidery come to live even more. In my cloud I used some of those swirly stitches in the lightest shade of grey and even added a couple of small stitches in the medium grey colour. 
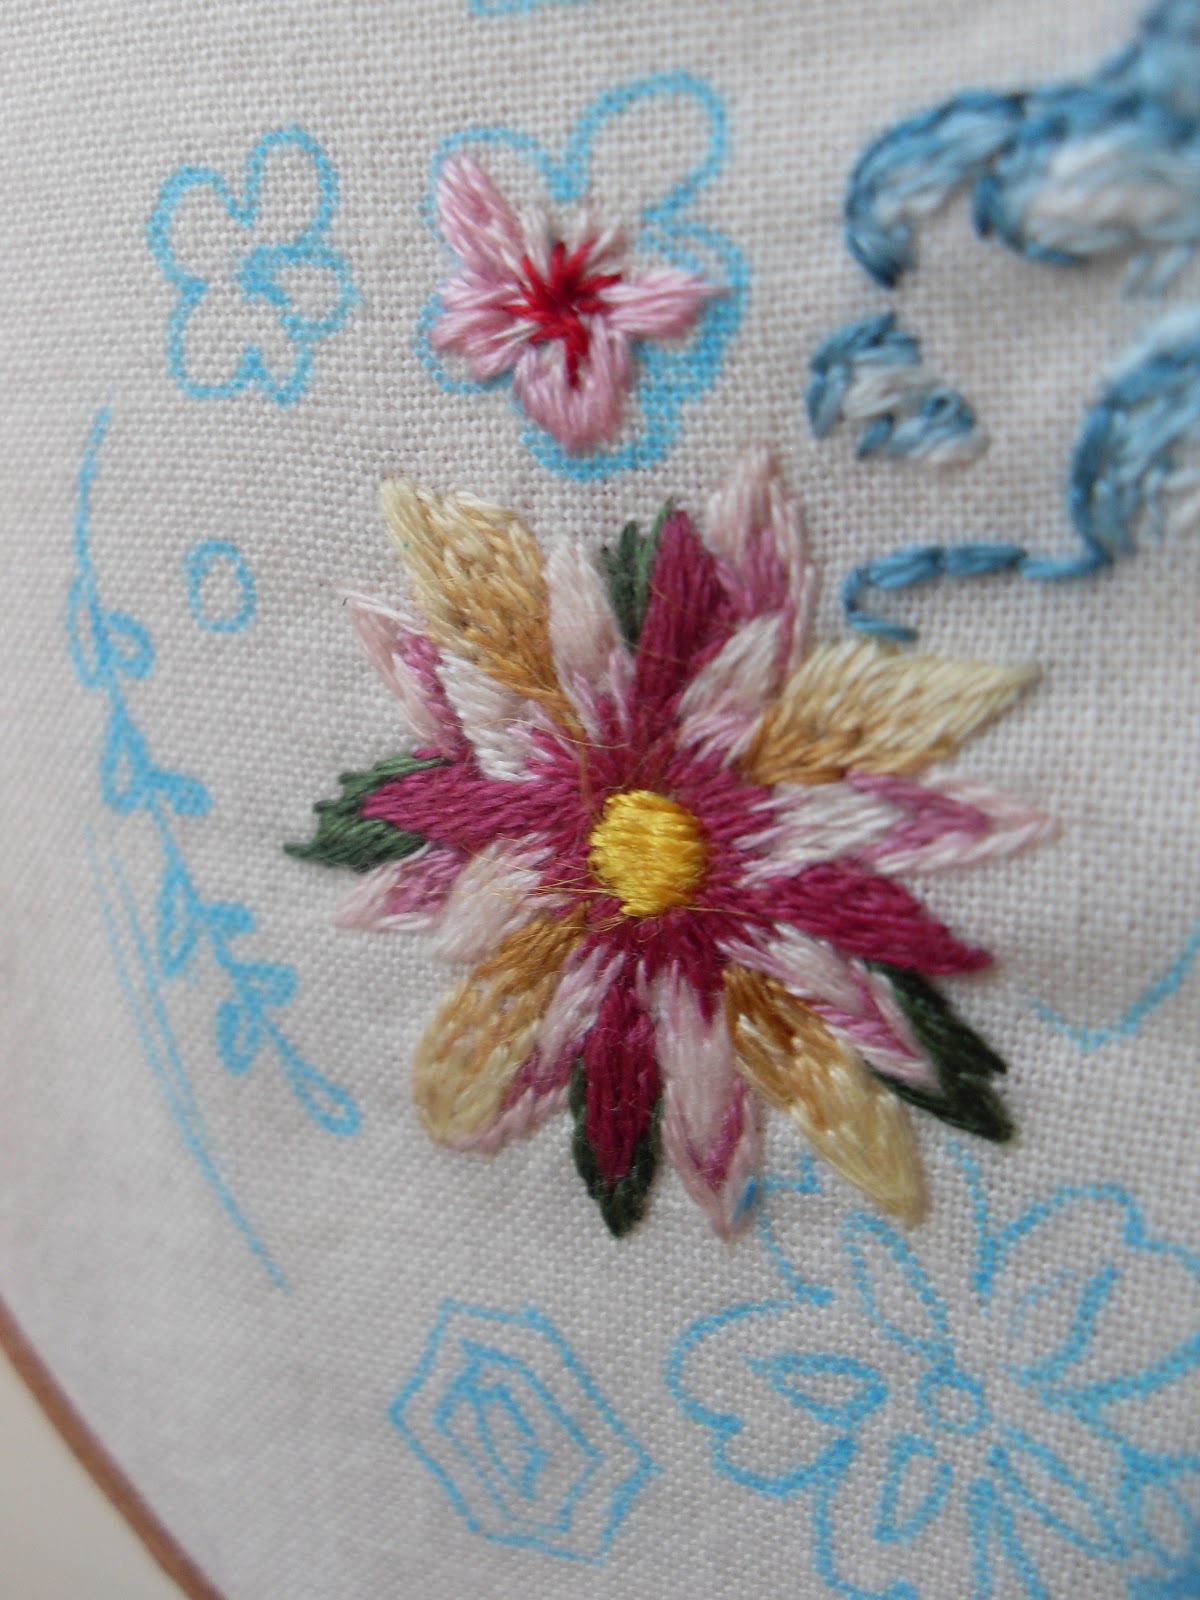
After you have finished fill stitching the whole cloud, stitch the eyes with a few simple back stitches on top of your fill stitches. 

After that it's time to move on to the drops! I'm going for some happy coloured drops (see top photo) using a satin stitch. So far I selected DMC Mouline floss:  720, 725, 834 and 3848. I will post an update of my own cloud (and drops) on this blog soon!

A few final words...


If you choose to use more shades (and only one strand of floss) the effect will be definitely be smoother. However in my experience it's not effective to use too many shades or shades that are too similar. Especially not if you are working on a (relatively) small sized project.

Hope you enjoyed this tutorial! Don't forget to share your own clouds in my Flick group here

Friday, August 24

Making clouds...who is with me?


I'm working on a short tutorial for you all to help you practice your shading technique. (Follow the White Bunny style obviously) I think it should be done some time next week. I made a simple cloud design and for the shading you will need several shades of the same colour.

For this small project I belief that working with a dark, medium and light version of one colour is sufficient. From a distance the eye will 'blend' the shades anyway, but you can add more if you are feeling adventurous. As to the colour: you can pick grey or any colour you want your cloud to be. Make sure the colours are good for blending though. If you look at the DMC colour chart (you can view one here) you will see that most colours that are within a colour family (close to each other) will blend nicely. I found that if you pick colours that are too similar the effect in your shading will not be as good as with shades that are bit 'further apart' so keep that in mind when you choose your colours. 

Now I thought it would be fun if I would host a small stitch a long when the tutorial is on the blog! It's a really small pattern so it's not a huge commitment. Who is with me???

Friday, August 10

Cloud busting


Here's a little update on my rabbit embroidery again. I have a new camera and the photo you see above captures the actual embroidery/stitching much better than my old camera did, even if I have no idea how to use my new camera properly yet. :)

Since the last update (a couple of months ago) I added the green leafy branch. I think I used about six different shades of green but it doesn't really show as much as I hoped to... The small white flowers are also new additions. Not much shading in those though.


To make the background more interesting/varied I'm adding grey clouds to the piece. I'm using white and three shades of grey for those. While stitching the cloudy background I'm always reminded of this Kate Bush classic called Cloudbusting.


It's from her fab Hounds of Love album which is very dreamy and lovely. Anyway, have you tried shading yet? I'm thinking of making a tutorial on how I'm 'Cloudbusting' (by which I mean: making shaded embroidered clouds) if anyone is interested.

Friday, May 25

More shading


I'm still happily experimenting with shading in my Rabbit embroidery. I think I wrote earlier that I'm not looking to stitch very realistic stuff, I just want to add some subtlety to the fill stitching and colouring in my embroideries. And that takes time. Time to learn and time to execute. It's really worth it though and fun too. So the flower may not perfect but that's ok because I learned lots from stitching it. :)


After I stitched the (rather large) flower I washed out all the old blue markings and made new drawings directly on the fabric. I'm rather pleased with the flowery additions. The rabbit is now called Lucky by the way, after my previous blog post (which was mainly about how lucky I felt with the swap goodies I received). I thought it was a cute name for a rabbit. 


Monday, April 23

Subtle shading

Attempt at subtle shading
I am always looking to improve my embroidery techniques and inspired by Trish Burr's wonderful book Colour confidence in embroidery (find a book review I wrote about it here) I decided to try and improve my 'subtle shading' technique.

crazy fur stitching in action a couple of years ago. this piece was finished but can't find a photo of the finished jackalope right now!
Usually, especially when stitching animal furs, I use what I call my crazy fur stitch. Effective but not exactly subtle!


Colour confidence in embroidery has many lovely, if not a little traditional, projects (birds, flowers, fruits) but no furry animals. And I love stitching furry animals! So I drew a bunny myself and I'm now trying  my shading techniques on it. Which sounds cruel but I can assure you no bunnies are hurt during the process. ;) I quickly ended up doing some 'crazy fur stitching' again. So I think I'll do some unpicking and  try to follow Trish's suggestions a bit more. :)