Showing posts with label tutorials. Show all posts
Showing posts with label tutorials. Show all posts
Friday, March 28
Keep it together: tutorials for drawstring bags
The best way for me to keep embroidery project supplies together is by keeping them in a bag or basket. Bags are especially good if you want to take your project with you. I made quite a few drawstring bags (and received some too!) over the years. Generally they are quick and easy to make and you can find lots of tutorials online.
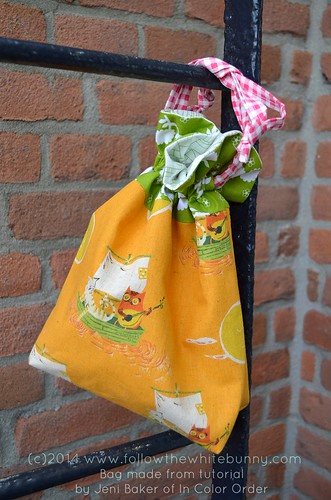
I recently made a new, lined drawstring bag from a tutorial by Jeni Baker of In Color Order. A perfect project for the cute Owl & Pussycat fabric I had in my stash. Jeni's tutorial was very easy to follow and I love that the bag has a 'boxy' bottom. I like bags with boxy bottoms. :) My bag can hold smaller projects but if you are looking to make a larger version you can buy a pattern with various sizes.
A few other drawstring bag tutorials. There's one from the Purl Bee Blog and another really easy one by Amy Smart. And if you like a scrappy patchwork bag then be sure to check out this tutorial by Ayumi of the Pink Penguin blog.
A couple of years ago I made this drawstring bag for a swap. It's from the Pretty in Patchwork Holidays book but you can find this particular tutorial by John Adams for free on Sew Mama Sew.
Do you have a favourite sewing tutorial or pattern for craft bags, caddies or other craft storage solutions? I'd love to know!
Monday, December 30
My Best Embroidery tips (and such) in 2013
So, just in case you missed a few of my more practical posts this year, I made a 'best of' selection for you.
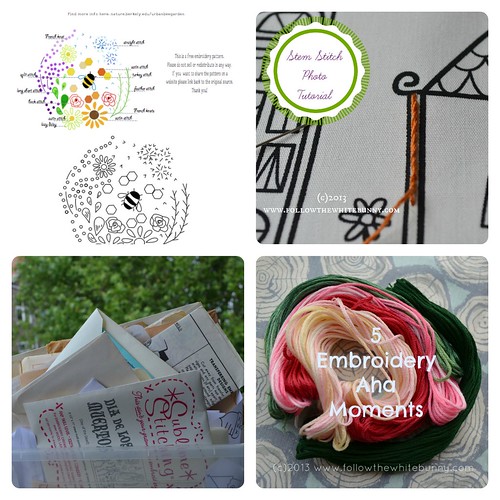
At the start of the year I posted some ideas of how to embroider a 'basket-like' effect. On (or around) my birthday I posted a Free-bee pattern. I re-acquainted myself with the Stem Stitch and made a tutorial for you. There were lots of useful comments for storing patterns (both printed and pdf patterns) on my post about Pattern Hoarding. And there will definitely be a follow up to my Embroidery Aha moments post as I have a lot more floss and stitch tips to share so look out for that in 2014.
Wishing you all a safe New Years eve and I hope to see you all back here in 2014!
Thursday, August 16
Quilt bindings: a small round up of how to' s
I'm actually finishing some quilts I have had in the works for quite some time! Pictured above is a detail of a baby quilt. I made the quilt top last year but never bothered to finish it, until last week when friends had a baby girl and I remembered I had the perfect nearly finished gift for their newborn. :)
 |
| this the quilt with the binding not yet sewn to the back |
 |
| mitered corner |
Now I have learned in the past couple of years how to sew a binding on a quilt. I even got the hang of making passable mitered corners. I always sew the binding to the front with my sewing machine (and hand sew it to back.) The only bit that I still mess up every single time is joining the ends of the binding. Even after reading all the instructions in the quilt books I have. Luckily I have lots of knowledgeable sewing friends on Twitter and Instagram who helped me today so I thought I'd do a little round- up of the tips I received about binding a quilt. Most links are to full quilt binding tutorials in which various ways of how to join the ends are included.
Today I used Katy's tutorial (scroll down and you'll find a pdf) to join my ends. I only messed up a tiny bit (but it still looks ok) but that is totally my fault and not Katy's. :)
Lynn of the Little Red Hen blog has another way to join ends and you can find a photo tutorial on quilt binding on her blog. The same method is used in this You Tube video by Marci Baker of Alicia's Attic. (don't let the music scare you away hehe)
Wendi Gratz has a video tutorial on her blog that shows yet another way of joining ends. It's similar to the way it's done in this YouTube video by Barb Sackel (someone I had not heard of I must confess but apparently she is a Master Quilter)
Another couple of quilt binding tutorials: Julie of Jaybird Quilts has written an (extensive) series of tutorials on how to bind a quilt. Rita of Red Pepper Quilts shows us how she makes her bindings She sews the front and the back on by sewing machine as does Amanda Jean of Crazy Mom Quilts in this tutorial.
Hope one of these (or all) are helpful to you!
Saturday, July 10
A little birdie told me.... it's Follow the White Bunny Summer Sale!
 |
| Click on the photo to read the Sale details |
It has been so very hot here, I can't imagine it will get any more summer-y than this! Paddling pool for the kids in the garden, barbeques, drinking iced tea and iced coffee, slowly solving giant sudoku puzzles, reading a bit, embroidering a bit and generally being quite unproductive. Anyway, it seemed like the perfect time for a Follow the White Bunny Summer Sale! So head over to the shop and get your favourite pattern now. It's 20% off all individual patterns until the 17th of July! Mention 'Followbunny' in the comments to seller and the discount will be refunded to you via Paypal. :)
In about two weeks time the shop will close for a couple of weeks. While I love all my patterns dearly, some of them, will not return. Or maybe some will but a little different. I'm not sure yet. During these lazy summer weeks I will post a few newbie embroidery tutorials on thiis blog. I wrote these earlier this year on the Crafty Bird blog but I thought they deserved a second round!
Subscribe to:
Posts (Atom)


