
Happy New Year everyone!
I probably should have called this post 'Sewing with 60 degree Triangles with one Flattened Point' but that isn't quite as catchy as Sewing with Triangles (which to me sounds a bit like Dances with Wolves except it isn't quite as dramatic)
So I treated myself to a new quilt ruler recently called Hexn'more designed by Julie of Jaybird Quilts with which you can cut Hexagons, Jewels and...Triangles! I saw some really neat triangle quilts on Flickr and Pinterest and as I ordered a Low volume Fat Quarter bundle alongside my ruler I thought I would have a go at making a Low Volume Triangle Quilt!
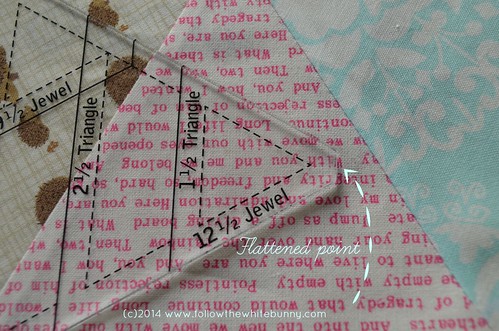
Now the new ruler did have a leaflet explaining how to cut fabric using the ruler and how to sew together different shapes but I couldn't find information on how to simply sew two (or more) triangles. The triangles have two pointy and one flattened 'point' which was where I got confused. (I get confused easily with quilting stuff). A call out on Twitter and googling didn't help but I figured it out eventually. It's very likely that for most people it is obvious how to sew triangles with a flattened point together and I know it isn't exactly rocket science but I'm posting this tutorial anyway as I assume there are people out there who, like me, are easily confused and because sewing triangles is perfect for beginners and the following might be helpful too, even if you are sewing with 'regular' triangles (which is even easier!)

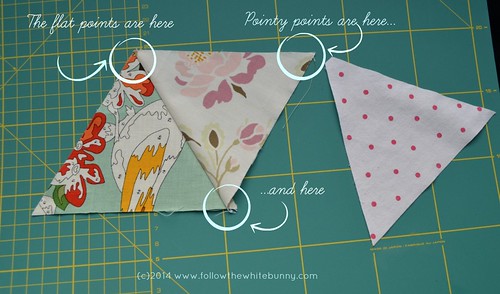
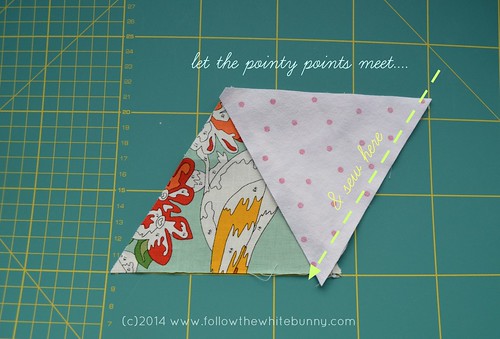
So you start with two triangles with each two pointy points and one flattened point.
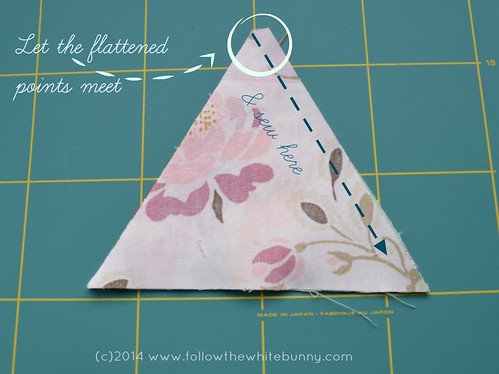
You put them right (pretty) sides together (on the photo you see the back of one of the triangles) and sew with a 1/4 of an inch seam allowance
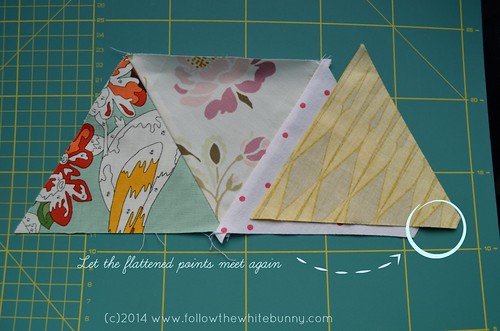
Fold open and press. Then put your next fabric triangle on top of the previous one, again right sides together.
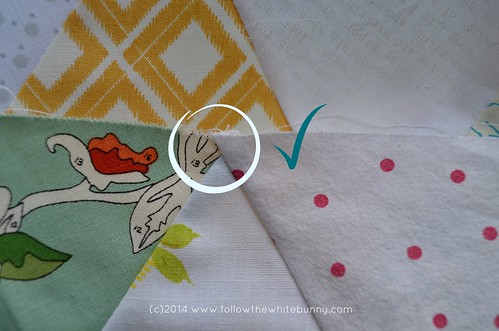
This time you make sure the pointy points of the second and third triangle match.
And so on and so forth...
The sewn together triangles should look something like this when you are done. The overlapping bit will disappear into the seam allowance when you sew your rows of triangles together!
I hope this was helpful! I'm making a huge bed throw using my Fat Quarter bundle of Low Volume Fat quarters, scraps, long time fabric stash dwelling fabrics and even (the dotty fabric you see above) an old duvet cover. My triangles are 4,5" high (measured from base till point). I will keep you up to date with the progress. :)
Thank you! xxx
ReplyDeleteVery helpful!
ReplyDeleteI am a Confused One Too! ... This Realllly Helped
ReplyDeleteI am a Confused One too. This Really helped me!
ReplyDeleteDo you press your seams open or to one side before you sew the next triangle on? Thanks.
ReplyDeletegood question! I pressed them to one side up till now but when I started sewing the first few rows together I had some difficulties sewing them neatly as some of the seams were very bulky when stitched together. I think I will press the seams open on the next rows and hopefully things will improve!
DeleteJust found this information of yours and thank you so much because I was soooo confused with those flattened points and didn't know where to put which point. Thanks again - it helped a lot!
ReplyDelete