I have been working on this bear pattern for a while now (maybe for too long I don't know) I keep adding things, discarding other stuff. Stitching and re-stitching. Changing shades and colours.Besides this bear I have two other (small) patterns and the three of them make a set. How I came to make this particular bear and why he's holding a fish is a whole different story which I will share with you some other time. ;)
If you'd like you can vote in the poll (top of the sidebar on the left) for which kind of FTWB pattern has your preference. I really would love to know! And if none of the answers provided, is the right answer for you please leave a comment here of mail me at followthewhitebunny at e-tropolis.nl. Thanks!
P.s. thanks for all the sweet comments about the Peeps sampler. The peeps are just so much fun to embroider!
Sunday, August 29
Friday, August 27
The Bard has news for you...
Yep, this colourful Sampler is the result of me and Lizzy House teaming up. I'm very excited and proud. Will let you all know when it hits the shop(s)!
p.s. I'm in a bit of hurry today, have a not so pleasant visit to the dentist scheduled this morning so head over to Lizzy's blog and read what the Bard Peep has to say!
Thursday, August 26
Improved
I made this cheerful, and hopefully gender neutral looking, bib this morning. Luna's teacher is going on maternity leave tomorrow and I thought it would make a nice goodbye gift. I have also added a (not perfect but still quite cute) personalised label. My new machine does some decorative embroidery like letters and decorative stitches. I'm not a fan of machine embroidery in general but I do find it handy to make nifty labels like these with it!
The bib pattern is from Amy Karol's wonderful Bend the Rules Sewing. I bought that book when I started sewing and used it a lot during the first year or so. I also tried my hand at the bib pattern then but it didn't turn out quite as nice as this one. :) Do you have an all time favourite craft book too?
P.s. Thanks for all your congrats and comments to my last post. It was also nice to read there are many other Viking girls out there!
Sunday, August 22
My new sewing machine!
I was supposed to get a new sewing machine for my birthday, 5 months ago but somehow it didn't happen until yesterday. I traded in my beloved, but a little too basic, Huskystar E20 sewing machine for this lovely Husqvarna Sapphire 835 (and had to add a considerable sum of money too) I had read mixed reviews on it's performance but to be honest in the end all the 'helpful' sewing machine review sites were more confusing than helpful. So I just went for the machine which had features I liked and I'm trusting my friendly local sewing machine shop to help out in case any problems occur. I especially like the longer arm on this machine (which makes quilting easier) and I have overcome my fear for computerised machines now. It's actually super easy to use! At least this one is.
Yesterday evening I quilted Luna's quilt (the one on the chair) with an easy stitch in the ditch and it went so smoothly! No awkward cluttering of threads on the backside of the quilt (like I had with my old machine), neat stitches and it's such a quiet machine too. I could even listen to my Ipod whilst sewing. I can't wait to try out some free motion quilting with this machine!
Wednesday, August 18
It's all in the cards...
....Foxes, Castle Peeps, an Alphabet and some cherry blossom for good measure thrown in as well. These are a few of the postcards of a set I had printed over at Moo. I'm very happy with them. If only I had a reason to pop one on the post!
Tuesday, August 17
4 (unrelated) things I'd like to share
1.Last week we went on a boat trip visiting parts of the Port of my wonderful hometown of Rotterdam, one of the busiest in Europe. Isn't it odd though that when I saw these containers I immediately thought 'Stacked coins quilt'? Which reminds me that the last quilt I actually finished was a 'Stacked coins quilt' and that was last year! *hangs head in shame*.
2.I keep forgetting to mention this wonderful freebie pattern of a Mermaid by Hillary Lang from Wee Wonderfuls. Her new book 24 dolls to sew and love will definitely go on my Christmas wish list!
3. I'd also like to mention an interesting Embroidery competition hosted by Andrea Zuill (aka Badbird) on Flickr. Read all about it here. The idea is that all entries are based on one of her free patterns. The rabbit above is an example of one of those patterns. I stitched it a little while ago for the Embroidery swap I was/am participating in.
4. Soon I hope to share a new set of patterns I've made. I'm currently stitching.the new patterns but I keep adding stuff all the time which slows everything down considerably. I'm also unpicking a lot and trying lots of stitches and colours. I hope you will all like it as much as I do. It's cute and slightly odd, but in a good way. :) Also the Castle Peeps patterns I have been working on with Lizzy House are coming sometime in the near future. I will be giving a couple of them away too on this blog!
Sunday, August 15
Sunday Stash #34: new place to keep my stash in
The frame (see post below) wasn't the only thing I brought home from IKEA last week. This cupboard was on sale, apparently from a line that will be discontinued, and it's perfect for my fabric stash! The cupboard is still a bit of a mess and the plastic baskets clearly need to go and be replaced with prettier ones.
In other 'news': I'm still looking for a new sewing machine and I'm very interested in this Husqvarna Viking 835. It has an extended sewing surface which is one feature I'm especially looking for in a new machine. It will be great for quilting!
Thursday, August 12
Cute fabric on a frame
As promised : my Wall Art Fabric Thingy for Luna's bedroom. The fabric panel with the Alphabet on is by Shannon Lamden (of Aunty Cookie fame). Luna is just starting to learn how to read so this is a perfect addition to her pink/red/green bedroom. The panel was too small for the frame so I had to add some fabrics around the borders. I bought the Bunny Fabric in Norway (if there are any Norwegian readers: I bought it at Ahlens), the Apple fabric is by Sandi Henderson and the Duckies are by Lizzy House. I used this Ikea frame and a staple gun. It was a little tricky to get the fabric positioned right in the frame. You will probably get the best results if you use only one fabric, preferably a slightly heavier quality than the quilting fabric I used. A canvas-like fabric for example. But all in all I'm quite happy with the result! :)
Wednesday, August 11
Attempt at pincushion
This super cute bunny fabric has been in my stash for ages. I used some of it today to make a fabric wall art piece for Luna's room. I've bought this Ikea frame but the fabric composition I made is not yet fastened to it, so I can't show it now but will do soon of course.
I actually have never made a proper pincushion. Having received several wonderful pincushions in swaps over the last couple of years there wasn't really a need to make one. But I thought this fabric would be so wonderful as a pincushion that I decided to try this simple tutorial. Mine didn't turn out quite as lovely as the one in the tutorial. I'm not sure if you can tell from the photo but it's rather LARGE and hasn't got the plumpness (if that is a word) I was hoping for. So more stuffing next time and a smaller diameter and I should be fine. :)
One of my favourite pincushion patterns of all time are Heather Bailey's Fresh-Picked Pincushions. Georgia made me (a perfectly sewn!) Apple Pincushion last year and it's absolutely wonderful. If you feel like making a pincushion too, or maybe try a new pincushion pattern: via the nice people of WeAllSew.com I found a great list of over 60 free pincushion patterns and tutorials.
Monday, August 9
How to transfer embroidery patterns
This is the second installment of my 'how to' series for beginners, high lighting some ways to transfer embroidery patterns. You can find the first one, about stuff you need when you start embroidering, here.
Iron on patterns
If you are using an iron-on design just follow the instructions that came with it. Be careful not to shift the pattern while you are transferring it to the fabric or you will end up with a blurry image. Note that vintage patterns (like the ones shown in the photo) do not always transfer well. And you may not want to cut into them either. They are so much fun to stitch though and by making a photo copy or scan you can keep them intact and use them as if they were pdf print out patterns. :)
Some vintage iron-on patterns. |
Do-it-yourself iron on patterns
Sometimes people use the print out of a (non iron on) pattern itself to transfer, just like it was an iron on. As far as I know this only works with laser printers and it might be a good idea to try it on a scrap of fabric first! Personally I have not managed to get very clear transfers with this method but it is worth a try. There are lots of other ways to transfer patterns to fabric though.
Carbon paper
Carbon paper is another option and can especially be helpful when transferring to dark fabrics. You put the carbon paper on top of your fabric and the paper pattern on top of that. By tracing the pattern and thus applying pressure with a pen or a stylus (a special tool that looks a bit like an iron pen) the carbon transfers to the fabric.
Pens and markers (to transfer home printed patterns or your own designs)
You can also use either a water soluble fabric marker or an iron-on transfer pen or pencil to transfer your pattern. Both are available in craft stores.
The water soluble fabric marker is used to trace designs directly on to the fabric. Ideally you use a light box but a window works fine too (during the day) (see photo above). Lately I have been using and empty clear plastic storage tub turned upside down with a lamp underneath as a 'light box'. (An excellent tip from Bookwormbethie!) Stick the printed pattern to the window or lay it on top of your light box and put your fabric on top of the print. Trace the design onto your fabric. You can remove the marks of the water soluble pen with water after you have finished stitching. Sometimes, for more detailed patterns, I use a normal 'grey' pencil for tracing. But be careful because pencil marks can be difficult to wash out!
Iron on pens and pencils are pretty easy to use too. Read the instructions of your pencil or pen and use accordingly. With this method you will trace the printed pattern with your pen or pencil. The ink or pencil marks will be transferred to the fabric through the heat of your iron. Just like an iron-on pattern. Keep in mind that the image you will produce using this method will be a reversed version of the image on the actual pattern.
Now you know how to transfer the image, the actual stitching can begin.Next time I will discuss some handy books and sites to learn your stitches from!
Pens and markers (to transfer home printed patterns or your own designs)
You can also use either a water soluble fabric marker or an iron-on transfer pen or pencil to transfer your pattern. Both are available in craft stores.
Use your window as light box! |
Carbon paper, a water soluble pen and an iron on transfer pen |
Transfer with water soluble pen |
Transfer with iron on transfer pen |
Now you know how to transfer the image, the actual stitching can begin.Next time I will discuss some handy books and sites to learn your stitches from!
Saturday, August 7
On the Beach...
... in France.is where my husband and daughters found these little shell fish and oysters as well. I have no idea what these little shell fish are called in English (please leave a comment if you do know!). My husband and oldest daughter actually ate these (after the shell fish were washed and cooked of course) and apparently they taste a bit like mussels. The girls had so much fun finding these and just normal 'empty' shells too.
We had a lovely time in Bretagne (Brittany) in France, even if it was a little cold, rainy and misty on many of the days we were there. Read as much as I was able to. Finished reading Unlundun, which was a nice book but while I was reading I couldn't help but thinking it wasn't really a 'grown up' book. Also read Jonathan Coe's The terrible privacy of Maxwell Sim. It was entertaining, especially the bit about (female) bonding with total strangers through networks and forums on the internet (sounds familiar to anyone?) but not one of his best books I think. Then I read a Harlan Coben book (I was running out of books and turned to my husbands books) which was o.k. in it's (thriller) genre I suppose but the plot was very far fetched. I also read Water for the Elephants by Sarah Gruen and loved it. The book is set in the Depression era and is about life in a Circus. I'm not too fond of the Circus (I blame the clowns) but this was a well written interesting book and not at all as romantic as I feared it would be.
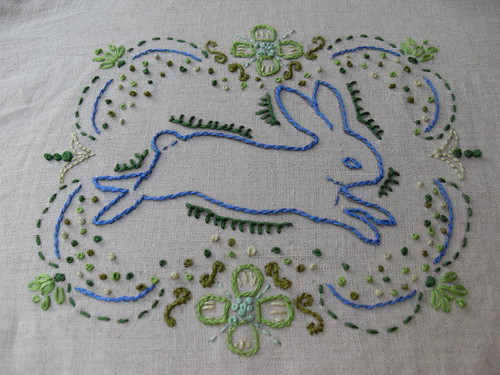
And I did a little embroidery as well of course. My adventure into cross stitching was an interesting one. I guess the pattern of the Ornate Key I used was a good project for a newbie. Cross stitching is actually much harder than I expected. I found it hard to get all the stitches even and find the the exact right spot where to put the needle to make a perfect 'x'. The other project I was working on is my final piece for the Hoop up! swap. I used a vintage illustration of the 'Hushabye Baby' lullaby.
I've still got some other stuff to share, including some odd postcards from the early 1900's I found on a market, but will save all that for later posts. :)
Subscribe to:
Posts (Atom)